
The Admin tab can only be viewed by Coordinators. For more information about the different user roles in Aspire, click here.
The Admin tab is used to manage users, activities, and resources in Aspire.
The menu in the Admin tab contains 5 pages, shown below.

Resources Requests
The Resources Requests page, shown below, shows you a list of all resources which have been requested by students.
NB - there are 2 types of resources in Aspire: Activities and Online Resources. To learn about how to add these resources to Aspire, see the following articles:
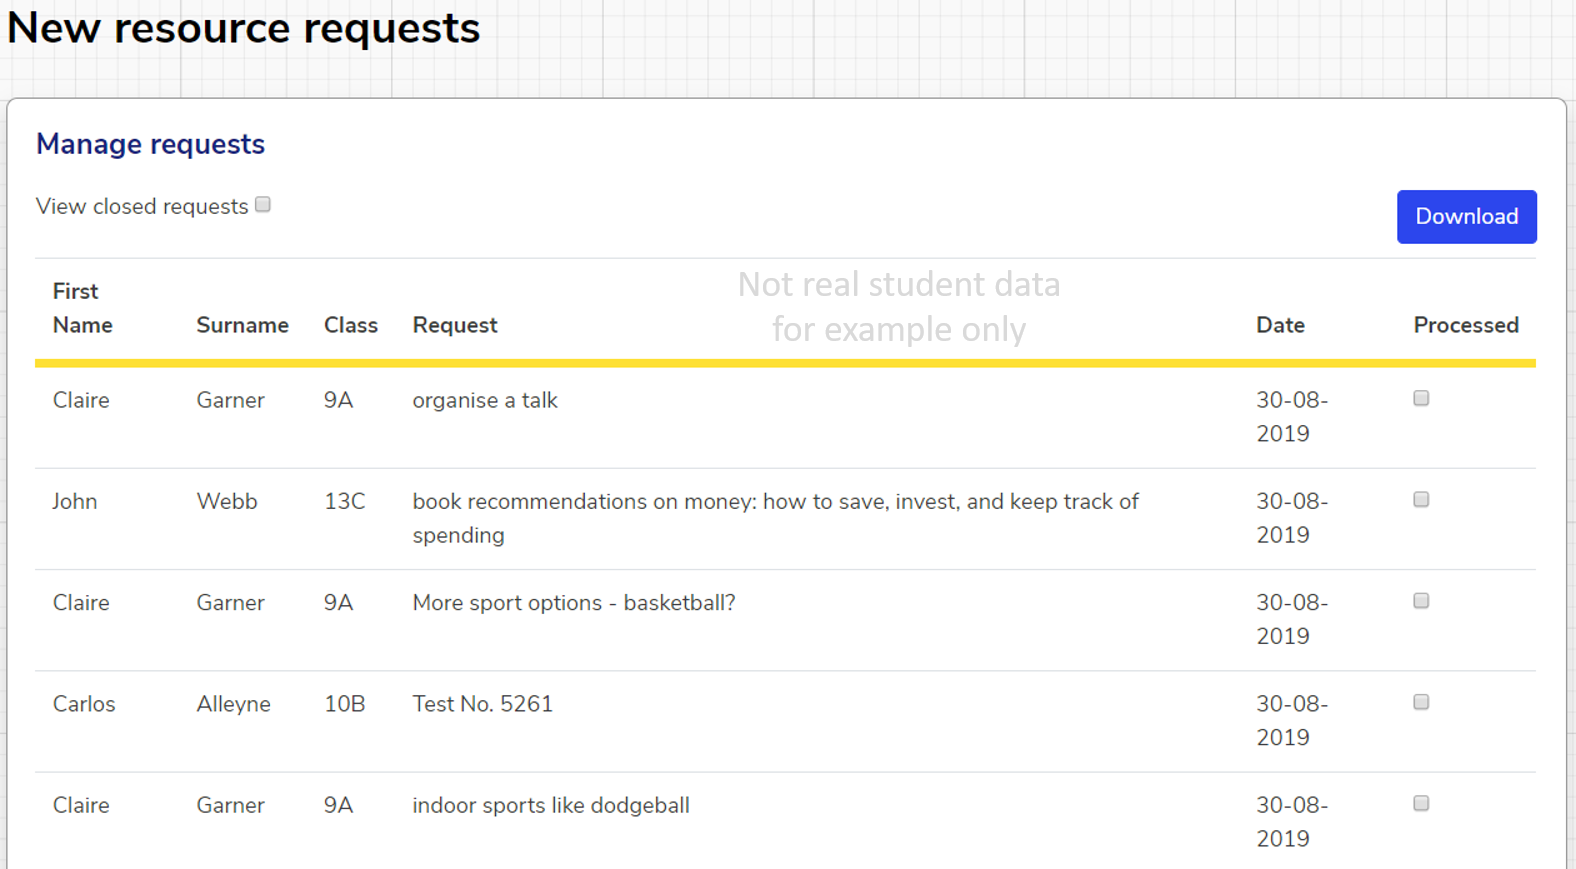
Clicking "Download" in the top right corner downloads an Excel file with:
- First Name & Surname of the student who made the request
- Class
- Request
- Date request received
- Whether or not the request has been processed
Checking "Processed" marks the request as having been processed. The page will refresh immediately, and the request will disappear from the list.
Checking "View closed requests" at the top of the page causes all of the requests with "processed" checked to reappear.
Activities
The Activities page is used to monitor and edit activities.

Clicking the "Add Activity" button in the top right will enable you to add a new activity.
Clicking "Download Attendance Data" will download an Excel file of:
- Term
- Student name
- Student Form
- Student Year
- Student Key Stage
- Any other groups the student is a member of
- Total number of activities that student has signed up to
- How many different clubs they student has attended
- How many times that student has attended an activity
- Which clubs that student has attended
Clicking "Download Activity Summary" will download an Excel file of:
- Activity title
- Activity description
- Support area(s)
- Date & time
- Location
- Duration
- Which student groups the activity is available to
The "Manage", "Sign Ups" and "Feedback" buttons in the top left allow you to toggle between 3 views:
"Manage" shows a list of activities, as shown in the screenshot above.
Clicking the pencil or bin icons next to a specific activity enable you to edit or delete that activity, respectively.
"Sign Ups" shows a list of students who have registered for activities, as shown below.
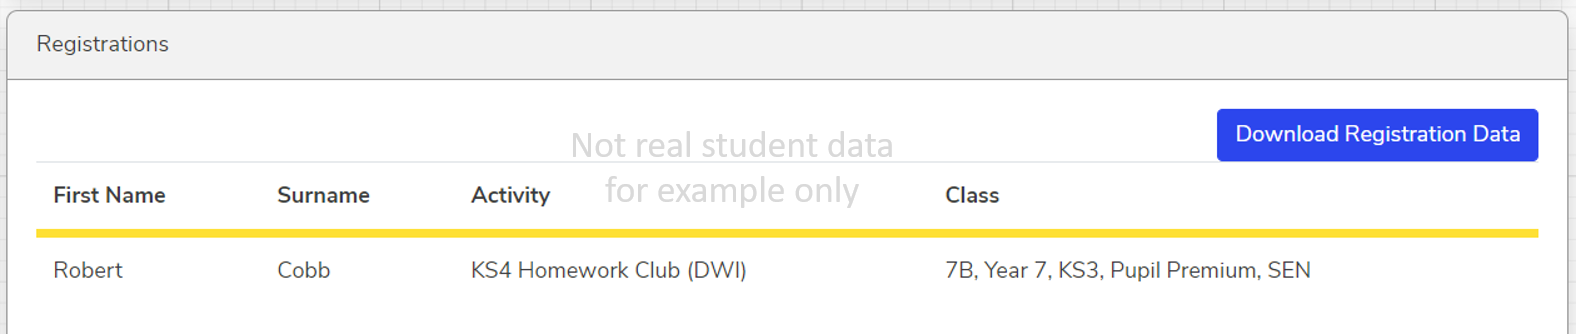
Clicking "Download Registration Data" downloads an Excel file of:
- Activity title
- Date
- Location
- Name of student signed up to the activity
- Email of student signed up to the activity
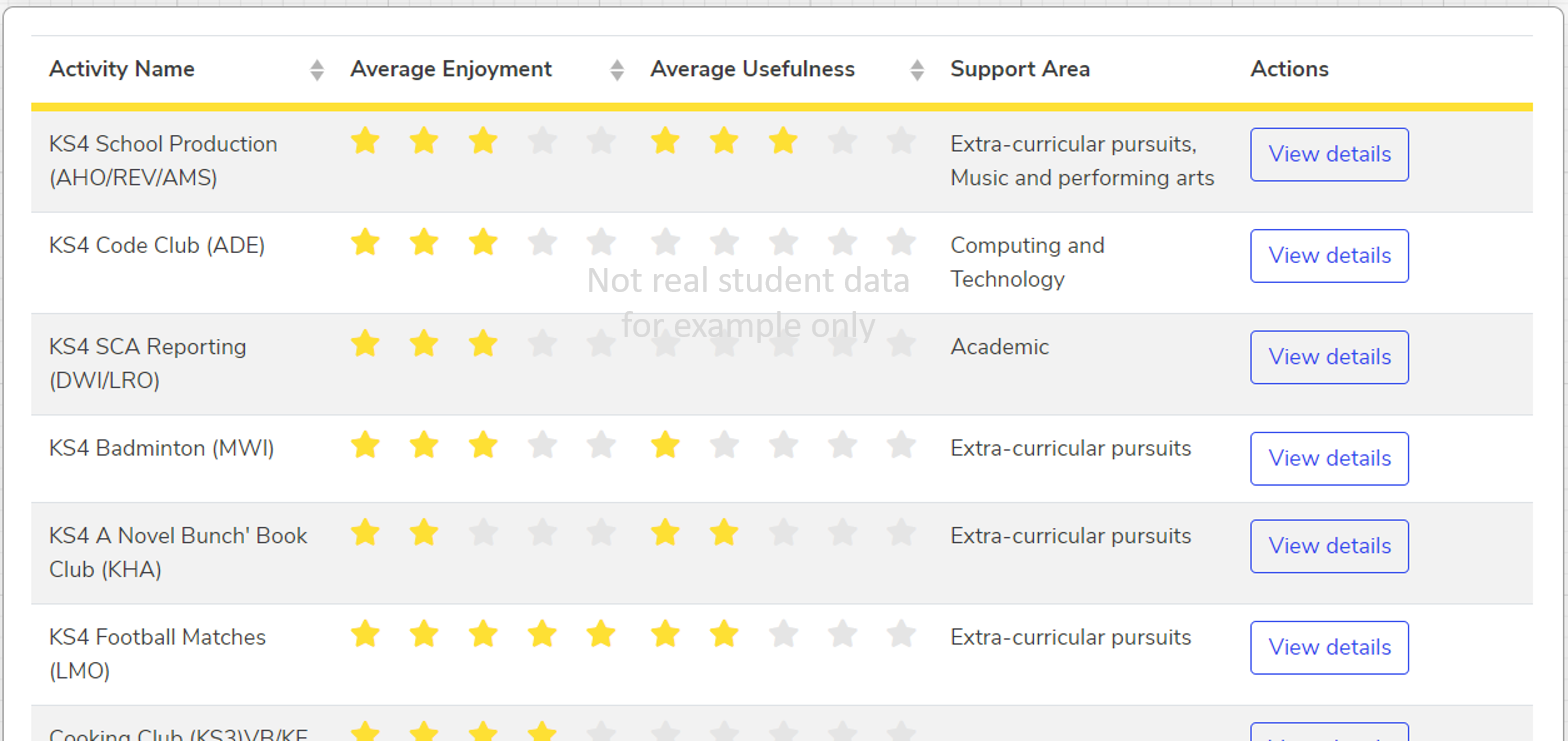
"Feedback" shows a list of feedback received for past activities, as shown below.
NB - The "Usefulness" score is an average of ratings for all the different targeted areas. Clicking "View details" allows you to see a breakdown of this, split by student and including comments.
Students are only asked to rate usefulness for focus areas they have chosen as personal priorities.
Students
The Students page allows you to add and edit students.
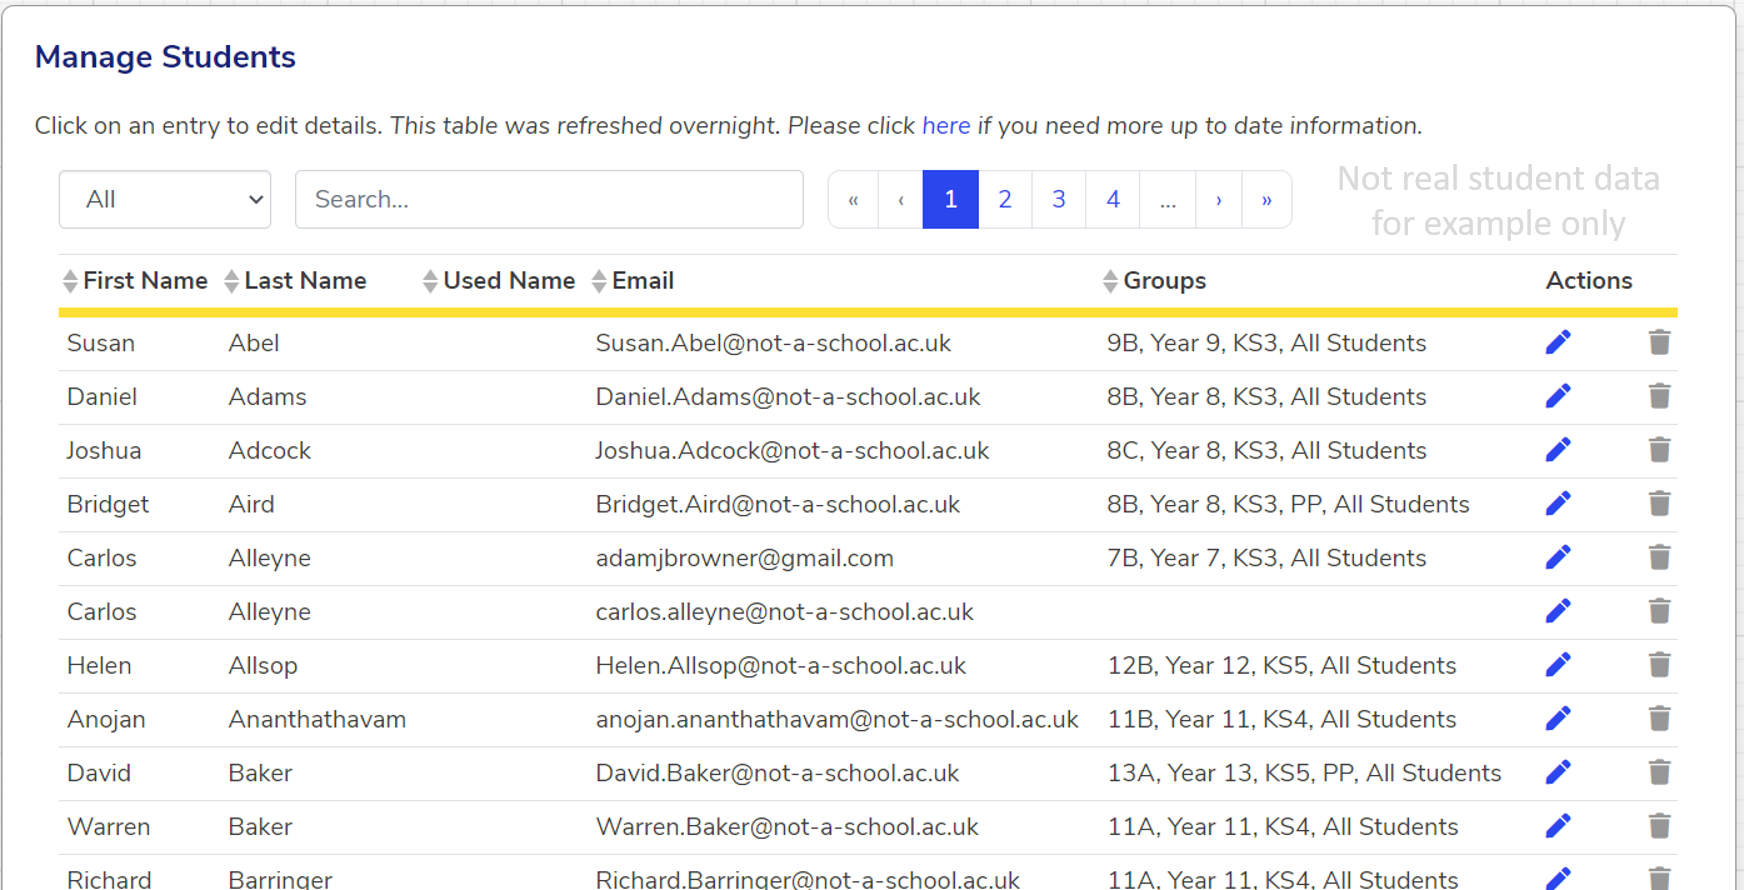
This page shows a list of every student in your organisation who currently has a login for Aspire. You can use the filter and search boxes at the top of the page to filter by a certain tag, or to search for a specific student.
By default, the list is sorted alphabetically by surname, but you can use the arrows at the top of the list to change this to sort by first name, used name, email, or groups.
Clicking the pencil icon next to a student will enable you to edit that student's name, email and tags (Classes).
Clicking the "Add Student" button allows you to add a student.
Clicking on the bin icon next to a student allows you to delete that student from Aspire.
Click on these links to learn more about adding and deleting students:
Staff
The Staff page allows you to view, add and edit staff users.
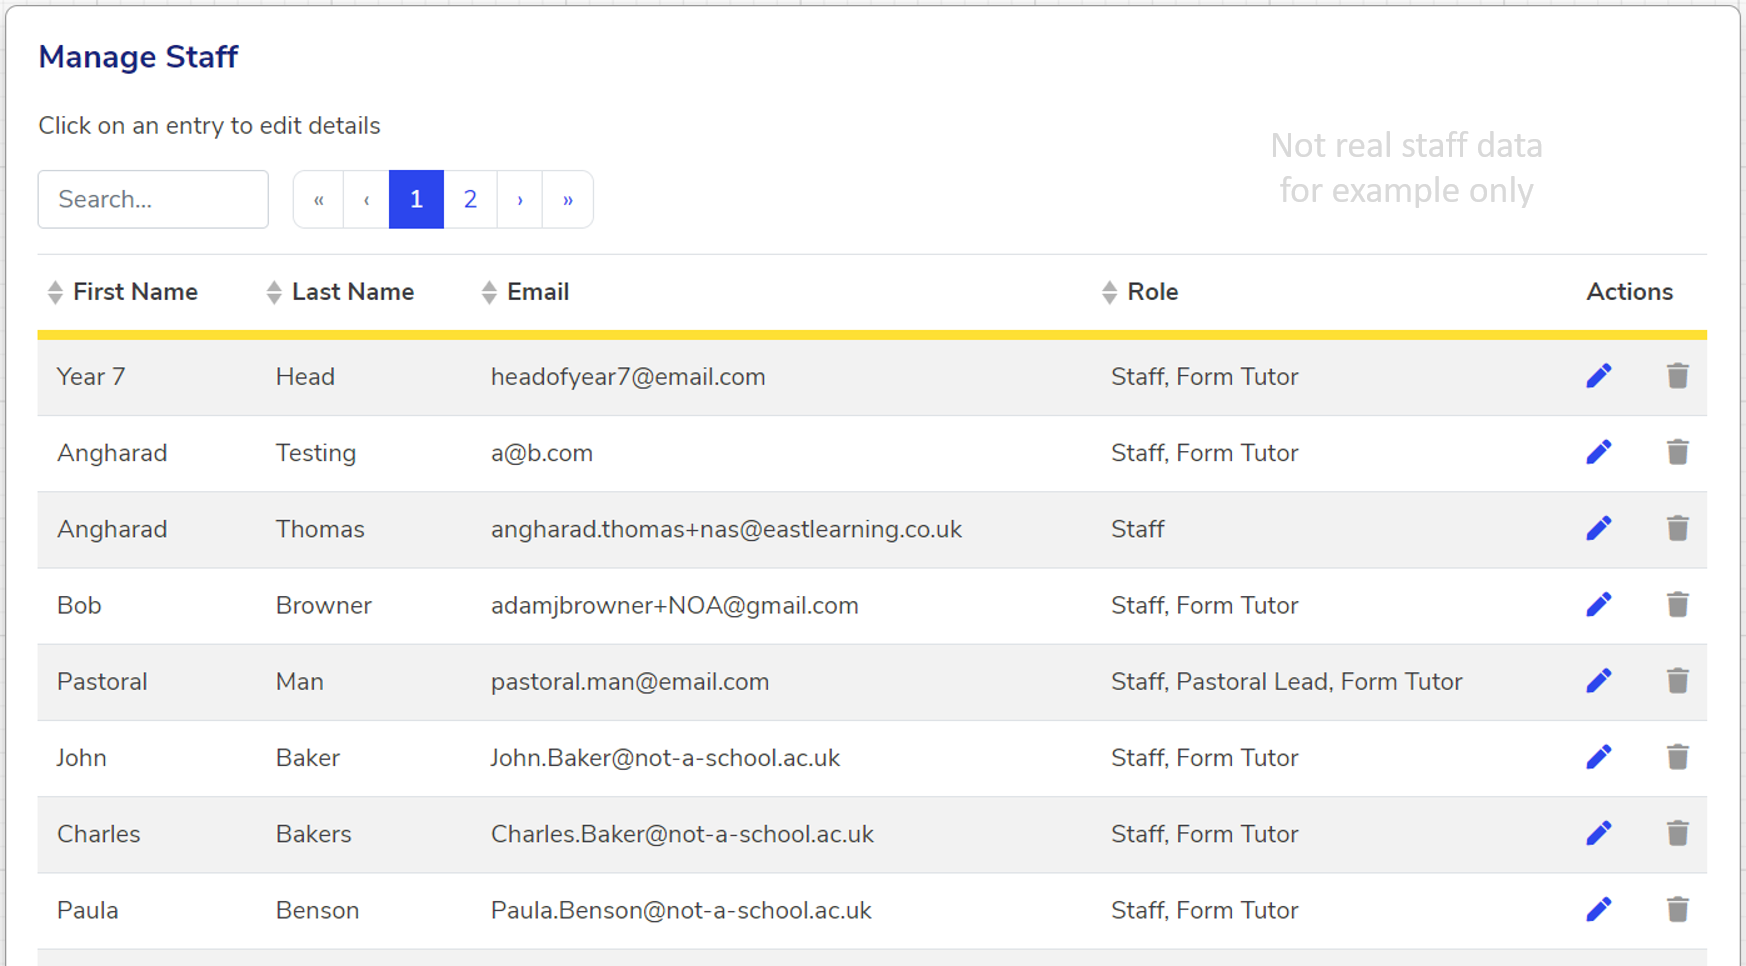
This page functions in exactly the same way as the "Students" page, as detailed above. Please see that section for information.
We hope you've found this guide useful. If you have any issues with using Aspire, please don't hesitate to contact our support team.
Comments
0 comments
Please sign in to leave a comment.